Let’s see how to connect VeeForm to your Flashy account.
In the “Integrations” tab of your quiz, click on “Add” next to “Flashy”. Please note that your form should collect an email address to be able to use this integration.
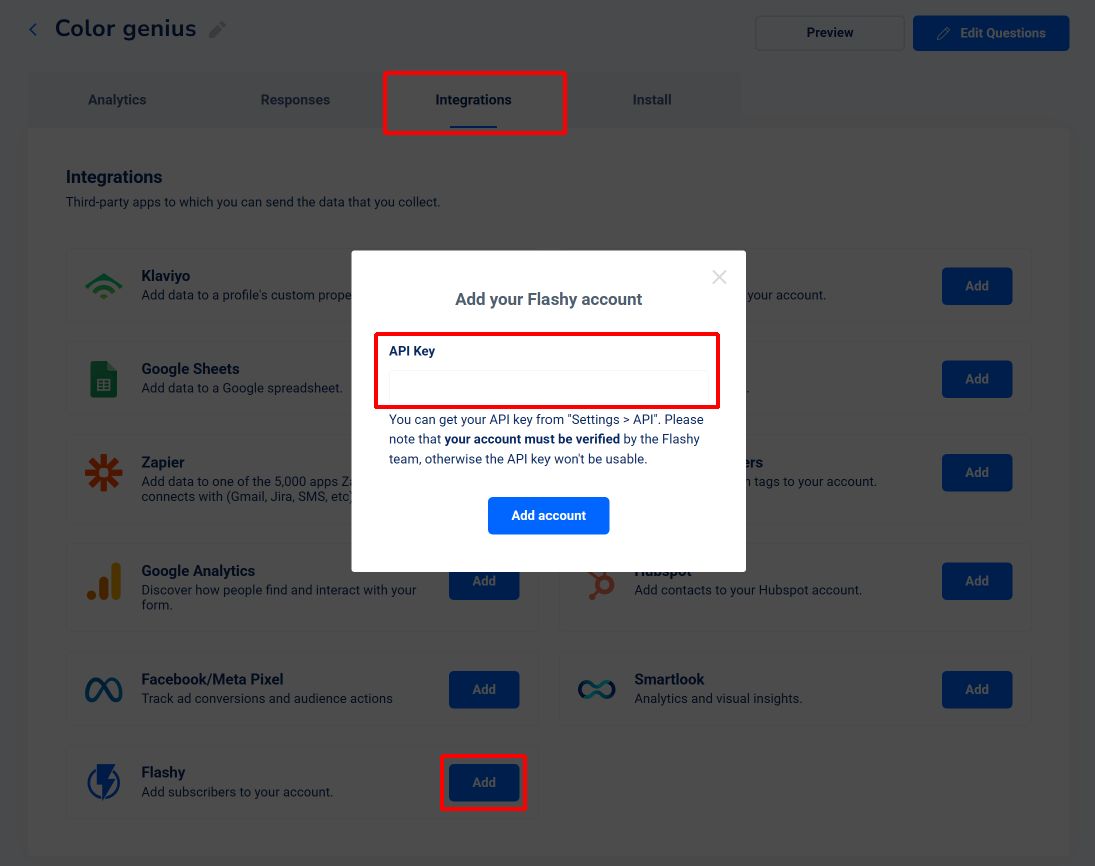
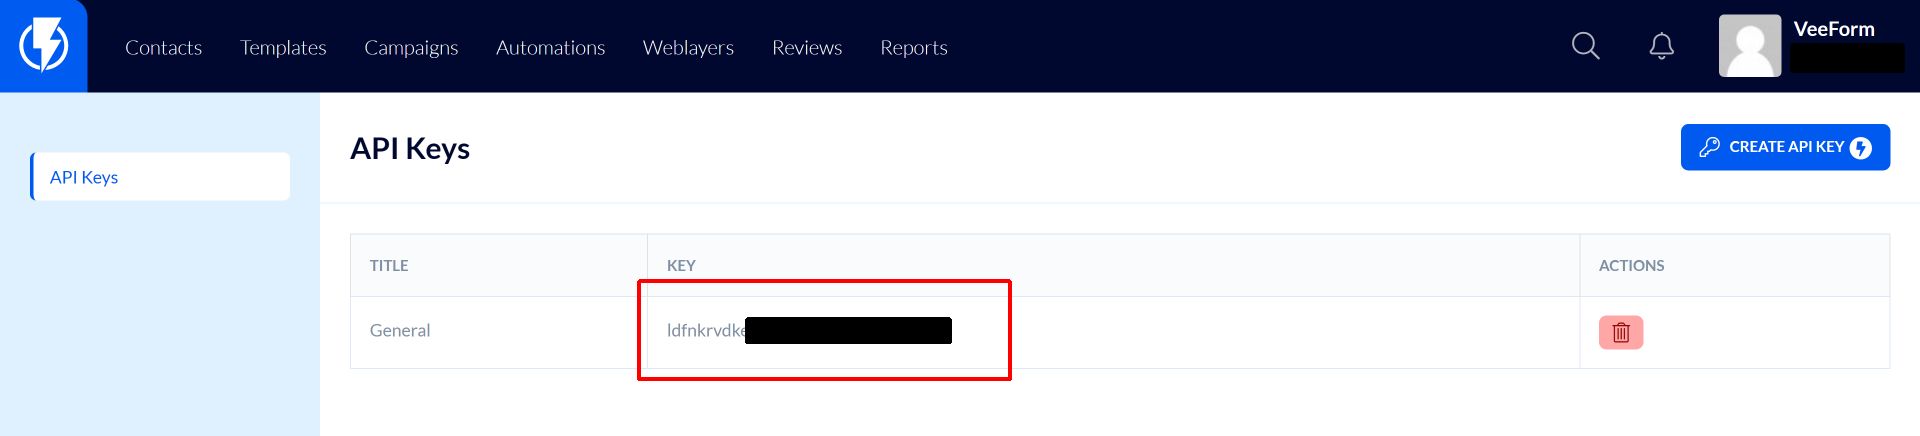
From there, enter your API key. It should be found in the top right menu of your Flashy account.
Note that your account MUST be verified by Flashy to be able to use the API.
Once you’ve pasted the key, click on “Add account”.
Now you should see a popup summarizing what will happen when someone answers your quiz. You can also select a list we should subscribe the new contact to (optional).
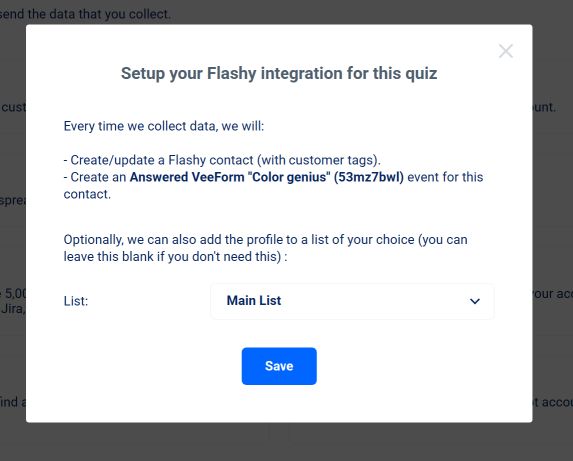
Hit “Save” and that’s it!
From there, any time someone answers your quiz and provides an email address, we’ll create a new contact (or update an existing one) and subscribe to the list you selected (if applicable).
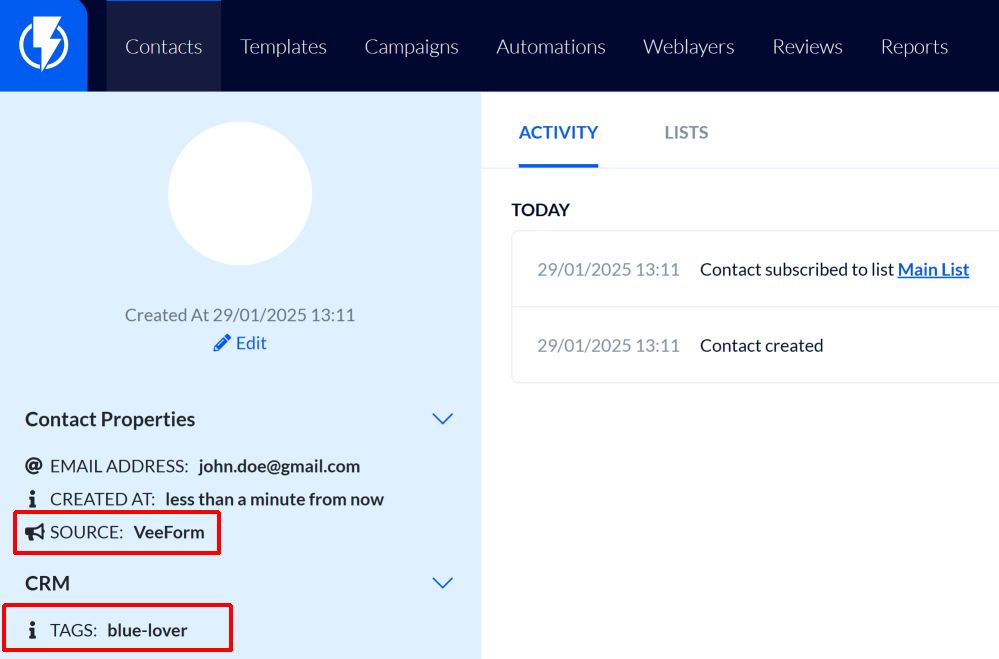
As you can see, if we created the contact, the “source” field will be “VeeForm”. Also, the “tags” field is updated with your customer tags, which is very handy to segment users based on their answers.
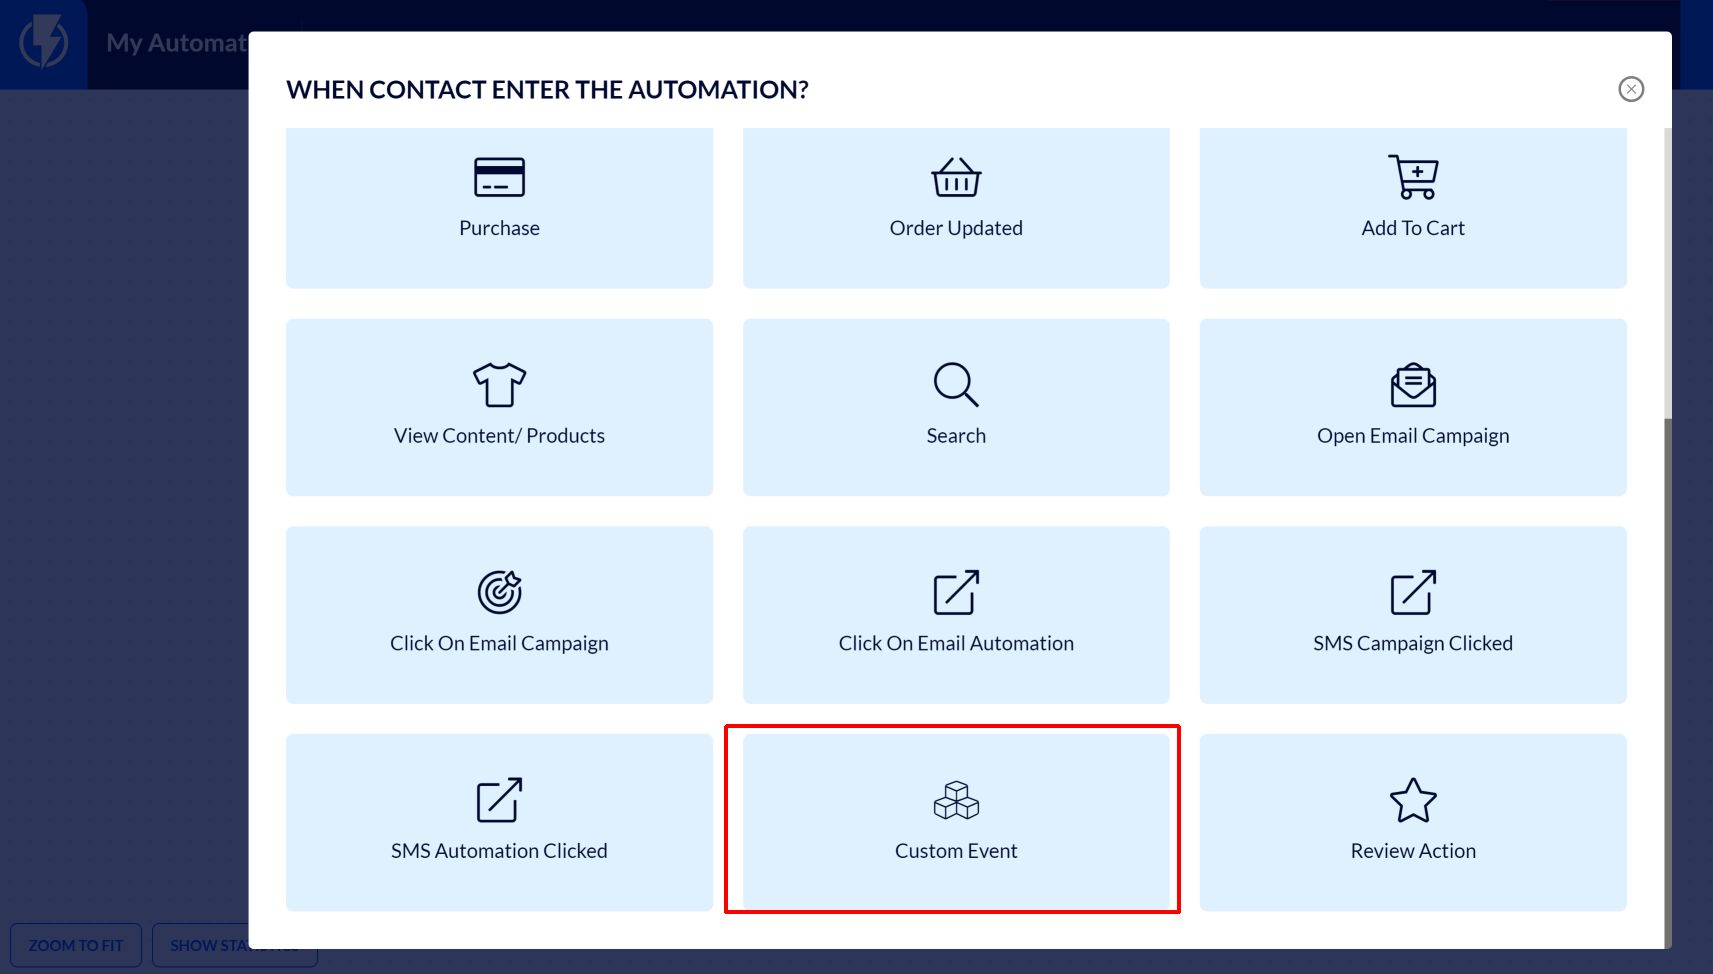
Triggering an automation
Since we also send an “Answered VeeForm” custom event, you can use it to trigger an automation when someone answers your quiz.
In Flashy, create a new automation (from scratch if needed). Then create a new “Custom Event” trigger.
From there, set the trigger condition to “Event Name” “Equals” “[The name of the event we saw in the VeeForm popup]” (cf screenshot below).
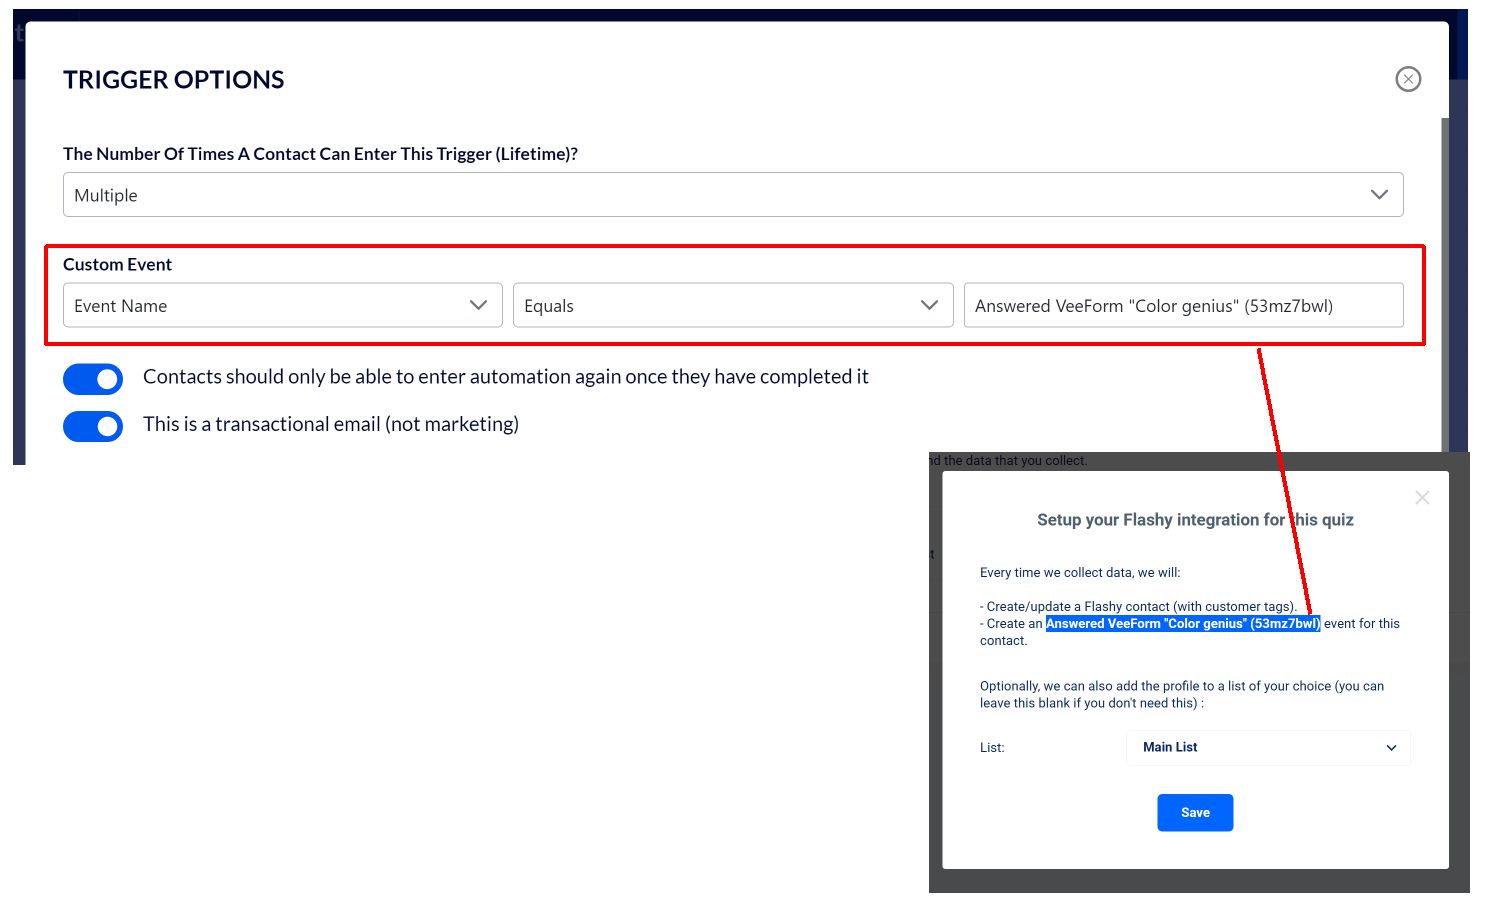
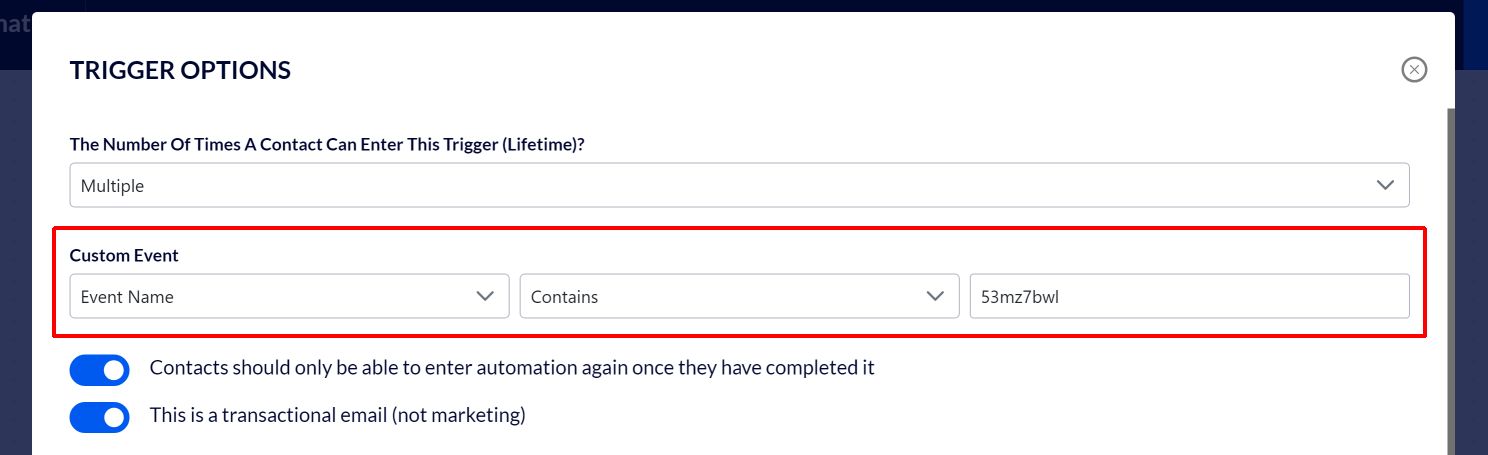
This may break if you decide to change the name of the quiz later on. So if you’d like a more robust solution, you can just use the quiz ID (53mz7bwl in our example) and have the following condition : “Event Name” “Contains” “[Quiz ID]” (cf screenshot below).
Click on “Add trigger” and that’s it! Every time someone answers the quiz (and provides an email address), the automation should be triggered (assuming it’s activated, of course).